This paver patio project was beneficial to both the homeowner and myself because we were on the same page throughout this paver patio project. I feel this is the best method of installing a brick pavers project that insures a successful business arrangement between client & contractor.
This client had an open schedule, had researched the product and new what they wanted, and had budgeted from installations we had performed for family & friends. After I made some crucial recommendation to the paver patio size and layout, the brick paver installation commenced. We used UNILOCK's Stonehenge 3 shape brick pavers and Roman Pisa wall & caps to construct the raised patio frame & step.
Here is the "Anatomy of a Raised Brick Paver Patio" that we installed for this client. Performing basic brick paver and modular retaining wall techniques will insure the long-term success and beauty of this raised paver patio. Enjoy this picture time line and I hope it helps educate homeowners and brick paver contractors a like.

 The customer had a patio stone patio laid on an inch or two of sand. This was a temporary patio until they could reach their budget for the "real" paver patio they desired! As you can see, the patio size did not facilitate the patio furniture and grill. We began by removing the patio stones, temporary cinder block steps, and removed the sod where the new raised patio was to be installed. We removed 10-12" more of the sod on the outside of the expected paver patio.


 The compacted gravel was then screeded and set to the height needed to set the modular retaining wall blocks & caps to the finished height of the paving stones of the patio. The radius and gapping of the blocks were set to best fit the limitations of the product and the objectives of the paver patio design. It is best to merge the restrictions of the products and objectives of the design to best maximize the appearance of the final product.
 Filter fabric (geo-textile blanket) is installed under paver base material and behind wall blocks to limit filtration of sub soil into paver base and limit any washout through joints of wall blocks.
The gaps of the wall blocks are filled and compacted prior to capping. This also will help firm up the wall and give it some added strength and help from settling behind the wall.
Wall caps were marked for diamond blade cuts and done uniformally to give the wall a finished look with no gaps.

Cutting with Diamond Blade saws is usually best done by a brick paver contractor. Many inexperienced paving contractors or homeowners use a guillotine cutter (hydraulic snap) or just plain out leave gaps for a poor finish look.

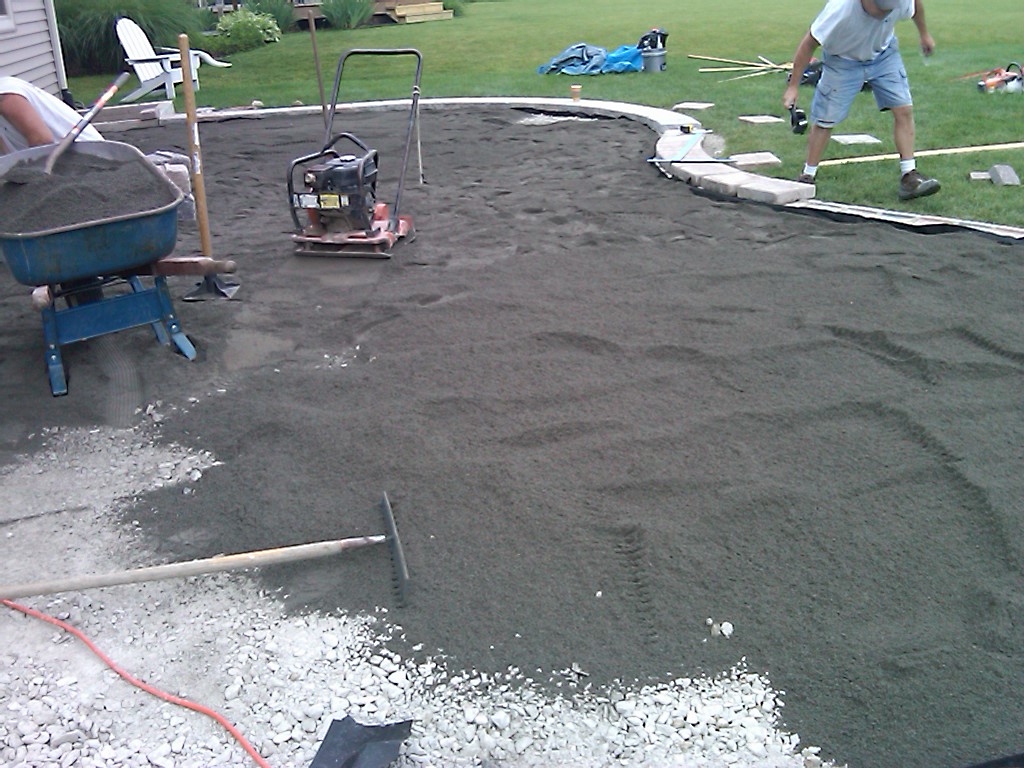
 Once the modular retaining wall blocks & caps were installed for this raised paver patio, the entire area was filled with paver base material in 4-5" lifts. Each lift was raked level and compacted with a power plate compactor. Tight areas along the back of the wall blocks and house were completed by a hand tamper. This particular raised paver patio needed @ 8" (2 Lifts) of compacted paver base to allow for the bedding course & paving stone thickness.
It is important to make sure the paver base is compacted level. If compacted uneven or pitching back to the house, the results over the years will be a wavy and improper pitching paver surface. The top of the paver patio will mimics the base below over time. The compacted paver base is your foundation!


Due to the size of this paver patio, we decided to split the brick patio in half and screed one area, lay the paving stones, then screed the second half and finish laying the remaining paving stones. Screed poles which are no more than galvanized 10ft poles bought at a hardware store are suffice. We usually use 3 poles at a time to screed large areas. The poles are reset and checked for height & pitch a few times before the final screeding takes place. After the final screed, the poles are carefully removed and the holes left are filled.

For areas that are tight or irregular, a keen eye and experienced "hand" screed is done with a mason's spatula. Going in different directions so slightly will help insure holes or voids being filled. We will check these areas with small torpedo levels to insure proper pitch.


We now give the entire brick paver patio an initial sweep of regular paver joint sand or polymeric sand. Do not worry about filling every little joint as you will be doing a finish sweeping later. Make sure that the brick patio or paver joint sand is completely dry when sweeping.

We then use the power plate compactor to set the interlocking pavers into the bedding course to achieve lateral "lock up" and set in our paver joint sand. We went in several directions to insure proper lock up and followed up with the hand tamper in tight spaces where the plate compactor could not get into. After we are satisfied with the final compaction of pavers, we do the finish sweep with the paver joint sand, making sure we get all joints and nooks & crannies.

 Here is the finished patio! Another estactic and satisfied client by Brick Doctor Bill. It was a pleasure working with a client who allowed us to work with the products benefits and now they will enjoy a patio for life. With proper yearly minor maintenance like sand sweeping and addressing any substantial settling due to frost damage, this raised paver patio will give years of enjoyment and neighbor envy.
I will return in the future to post great pics of the paver patio maturing and landscaping accents. I hope this pictorial was helpful in assuring a successful and long-term brick paver patio investment for you. On to our next "house call" we go!